Honey Harvest: Crush & Strain Method
- Annalisa
- Dec 30, 2023
- 3 min read

As a rookie beekeeper, 2023 was a memorable year!! I was finally able to harvest my super: 2 Flow frames and 4 foundationless frames. I am psyched at the feat!!
Harvesting honey is a rewarding experience, not only for the delicious end product but also for the connection it fosters with nature. One traditional and effective method of extracting honey is the crush and strain method. So, here is a quick "how to" with a few tips on what "not to do" when harvesting honey with the old and true "crush and strain" method.
Understanding the Crush and Strain Method
The crush and strain method involves, quite literally, crushing the honeycombs and then straining the honey to separate it from the comb and impurities. This method is particularly suited for small-scale beekeepers or hobbyists.
Step 1: Gather Your Equipment
You'll need:
A large bowl or bucket
A strainer or cheesecloth
A container to store honey
A tool to crush the comb (a potato masher works well)
Step 2: Harvesting the Comb
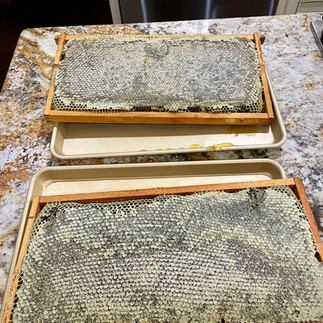
First, remove the frames from your beehive. It’s essential to choose combs that are fully capped since this indicates that the honey is ripe and ready for harvest. If you have a frame that is not fully capped, you can test its "readiness" by shaking it. If no honey falls out, then it's ready to be harvested. You can also use a refractometer to test the water content of your honey....that's the scientific way to do it! I do both. First, I shake a frame I am uncertain of, then I use a digital refractometer to confirm "my hunch." I place the frames in a stainless steel, deep container or large cookie sheets (after brushing off all the bees) and bring them to the house.
Step 3: Crushing the Comb
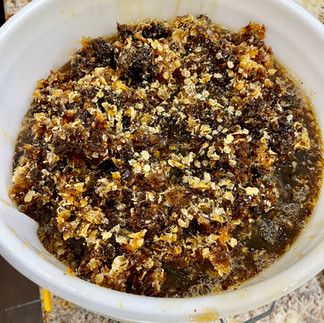
I then cut the comb with a sharp knife, tracing around the frame. Place the comb in your large bowl or tray. Using your tool (a fork or a potato masher), gently crush the comb. This releases the honey while breaking up the wax structure.
Step 4: Straining the Honey
Place your strainer or cheesecloth over a second container. Pour the crushed comb and honey into it. Gravity will help the honey seep through, leaving wax and larger impurities behind. I highly recommend investing in a honey bucket - food food-grade bucket with a filter that you can buy at any bee supply store. It will make your honey-harvesting life much easier!
I leave the honey dripping in the bucket overnight (at least, or 2 days).
Step 5: Bottling
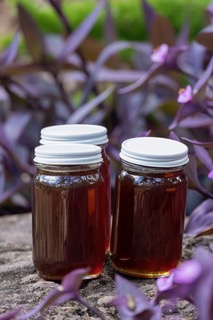
Once strained, the honey can be funneled into storage containers or jars. It’s now ready to enjoy! I also place the filter with all the "leftover" comb outside so the bees can clean up any little drops of honey left. After that, I bring the comb back inside for some wax extraction (for another blog post!).
Advantages of the Crush and Strain Method
Simplicity: This method doesn't require expensive or complex equipment, making it accessible for beginners.
Natural Process: By avoiding heat or mechanical extraction, you maintain the honey's natural qualities, including its enzymes, aroma, and flavor.
Wax Harvest: The process yields beeswax as a by-product, which can be used for candles, balms, body butters, and any other skin-care products you want.
Cost-Effective: Ideal for small-scale beekeepers, this method saves on the investment required for mechanical extractors.
Educational: It provides a hands-on experience, giving you a deeper understanding of the beekeeping process.
The crush and strain method of harvesting honey is an excellent way for small-scale beekeepers to engage directly with their craft. While it's a more labor-intensive process than using mechanical extractors, the simplicity, cost-effectiveness, and purity of the product make it a rewarding method. Plus, the added bonus of beeswax is a delightful perk. Happy beekeeping and honey harvesting, y'all!


Comments